
Introduction
Are you stuck with an unsightly pool deck, patio, or walkway? The solution lies in the transformative magic of concrete resurfacing, and one standout product gaining popularity is Gem-Scape™. In this comprehensive guide, we take you through the step-by-step process of unraveling the secrets behind Gem-Scape’s™ ability to breathe new life into old concrete surfaces. Whether you’re in Austin or Dallas, our team at Zion Outdoors has got you covered.
Time Stamps:
0:00-0:11 – Introduction
0:12-0:34 – Grind: The Foundation of a Resilient Surface
0:35-1:19 – Clean (Power Wash or Acid Bath): Preparing for the Gem-Scape™ Magic
1:20-1:33 – Base Coat: Our Adhesion with Polymers
1:34-2:04 – Pallet Board Placement: Setting the Stage
2:05-2:23 – Gem-Scape™ Mixing in 5 Gallon Buckets
2:24-3:04 – Gem-Scape™ Application: Laying and Troweling
3:05-3:36 – Hand Cutting Each Stone: Precision in Design
3:37-3:39 – Shading Each Stone with Sponges: Creating Realistic Texture
3:40-4:03 – Grouting with Our Gem-Scape™ Product
3:49-4:02 – Sealing: Ensuring Long-Lasting Beauty
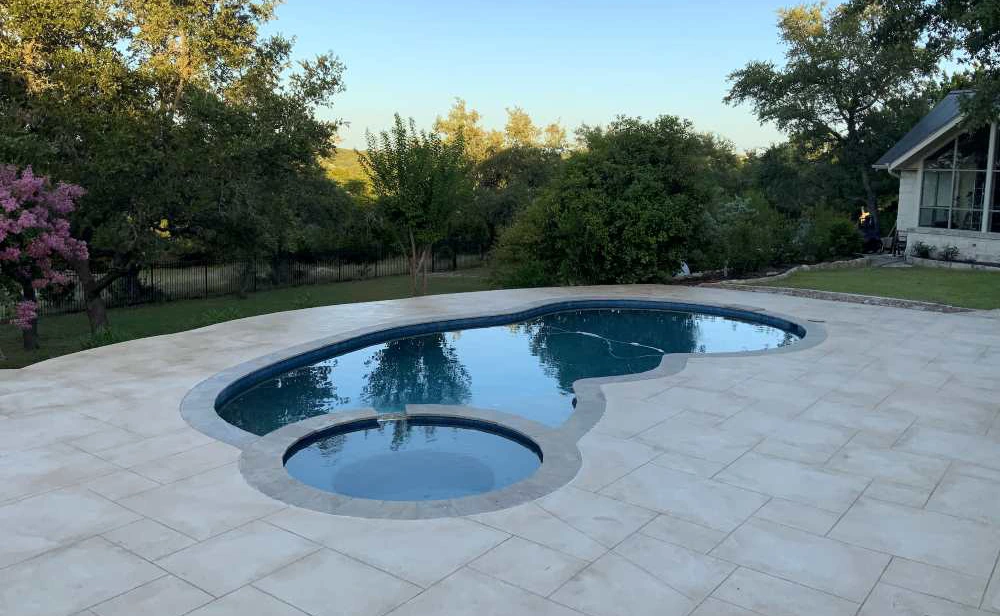
4:03-4:20 – The Finished Project: Revel in the Transformation
Here is the process explained:
Gem-Scape™ is a proprietary concrete overlay created by Zion Outdoors and was designed to enhance various substrates such as broomed finish concrete, stained concrete, stamped concrete, spray-on decking, and pea gravel. The product and process are exclusive to Zion Outdoors.
Step 1: Preparation of Surface Before Applying Gem-Scape™: For stained, polished, spray-on decking and stamped concrete, employ either walk-behind or hand grinders for optimal results. Manual chipping/tear out may be necessary for tile or natural stone. The surface is roughed up to get down to the concrete substrate, which is why a sealer needs to be grinded off, and we want to ensure the product is down firmly.
Step 2: Thoroughly clean the surface in some cases with an acid wash and a high-pressure power washer. Ensure a debris-free and uncontaminated substrate for optimal adhesion.
Step 3: Application of Bonding Layer: Zion Outdoors’ bonding layer is the highest-quality bonding agent that acts as a glue between the existing surface and Gem-Scape™. We apply the bonding agent by hand, ensuring even coverage.
Step 4: Pallet Board Color Approval Process: Before or after the bonding agent is applied, Zion will create a “Pallet Board” – a miniature board (3×3 in size) showcasing Gem-Scape™ colors. This is presented to homeowners for color approval, ensuring alignment with their vision and experience. Once the homeowner approves, we will begin mixing Gem-Scape™.
Step 5: Application of Gem-Scape™: Gem-Scape™ is formulated with a quartz and limestone mixture, providing both density and durability.
Integral Color: Zion ensures color consistency throughout the application by incorporating integral color from the surface to the bond coat.
All Certified Zion Artisans use approved pigments to achieve the desired color while maintaining the highest standards in color adhesion. Zion certifies all artisans to hand-apply Gem-Scape™, ensuring a bespoke finish and consistent product on every project. In addition, every square inch is treated individually, creating a unique and personalized design.
Step 6: Artistic Sculpting: Zion Outdoors uses a combination of tools and, most importantly, skilled artisans to cut and sculpt Gem-Scape™. This manual approach guarantees a distinctive and customized result. Because it is completed by hand, it emphasizes the human touch in the artistic process, ensuring no two projects are alike.
Step 7: Finishing Touches: Joint Lines and Shading: Open joint lines for an authentic natural stone feel. Employ sponges to shade each individual stone, adding depth and dimension to the finished product. Use techniques that mimic the natural variations found in stone and tile.
Step 8: Gem-Grout Application: Zion Outdoors uses Gem-scape™ for a seamless and long-lasting finish through our grouting procedures, emphasizing durability and aesthetic cohesion.
Step 9: Sealing for Longevity: Zion will seal the completed Gem-Scape™ project to protect against wear, stains, and environmental factors, ensuring lasting longevity.
Step 10: Natural Expansion Joint Treatment: A bead of self-leveling mastic is used to seal each expansion joint, commonly found around the coping of pools, every 4 feet in walkways and 10 feet in larger concrete spaces.
Step 11: Completion and Maintenance: Early Use and Vehicle Accessibility: Best Practice: The space can be used within a few days of completion. For driveways, wait 10 days before driving on them. Enjoy your new Gem-Scape™ project for years to come.
Ready for a Gem-Scape™ Transformation? Get Your Free Estimate Today!
Visit us at zionoutdoors.com to learn more about how Zion Outdoors can turn your concrete woes into a stunning Gem-Scape™ masterpiece. We offer free estimates in Austin and Dallas, ensuring that your outdoor space undergoes a transformation that exceeds expectations. Watch the video, get inspired, and let’s embark on the journey to unveil the beauty beneath your concrete surfaces.


")


